Tutorial
Index
How to use the LinkedIn Auto Connection Remover
PhantomBuster’s LinkedIn Auto Connection Remover Automation helps you remove selected LinkedIn connections in bulk. This tutorial covers the main setup steps and important usage guidelines.
Prerequisites: Requires a connected LinkedIn account and a list of LinkedIn profile URLs to remove.
Weekly safety limits: Recommended maximum of 80 removals per week for Basic accounts, or 150 for Sales Navigator.
Input file access: Google Sheets must be shared with 'Anyone with the link'. CSV file upload is available only on paid plans.
Free plan restrictions: Result exports include only the first 10 rows (no JSON or dynamic CSV links).
Resource usage: Uses 1 slot. Estimated execution time is approximately 40 minutes per 100 connections.
Choose target LinkedIn profiles: Provide profile URLs via a saved PhantomBuster list, a direct URL, a Google Sheet, a CSV file, or results from another Phantom.
The Phantom reads column A by default; specify the exact column header name in the settings to use a different column.
Connect your LinkedIn account: Install the PhantomBuster browser extension (Chrome or Firefox) to connect your session automatically, or manually retrieve your session cookie.
Keep your browser updated; outdated browsers or user agents cause session cookies to expire quickly.
Set profiles per launch: Enter the number of profiles to process per run (default 10) to manage your activity volume.
You can process a maximum of 100 profiles per launch.
Configure launch scheduling: Set the Automation to run manually, at a specific time, repeatedly, or after another Phantom to distribute removals safely over time.
Adjust advanced settings (optional): Modify execution limits, proxies, or file management settings only if you have specific requirements; defaults work for most users.
Launch and review results: Click Launch to start the process, then view the processed profiles and download the data as a CSV or JSON file once complete.
For more details and troubleshooting, see the full tutorial on the help center.
Write and customize your welcome message
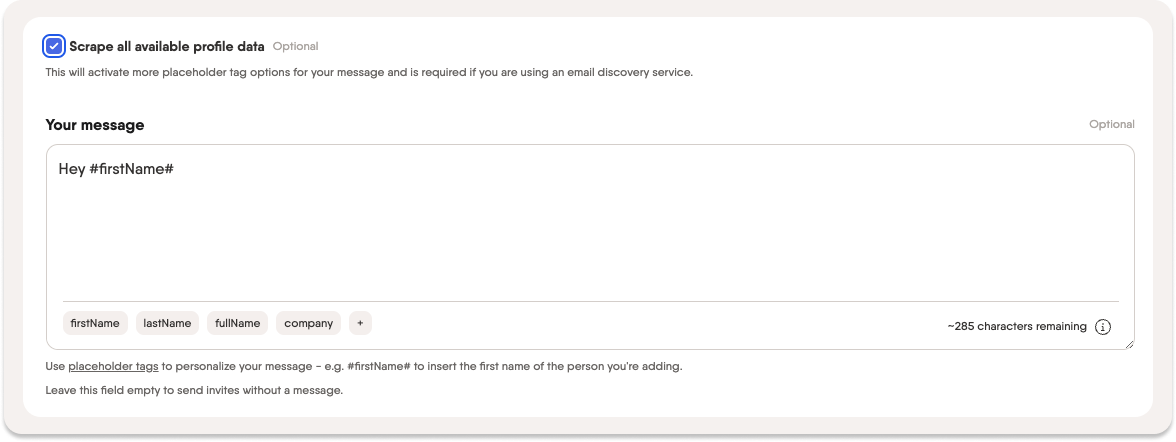
This section allows you to automatically greet your new connections in a personal way with a message of up to 8000 characters, to be sent once the user has accepted your connection request.
To personalize your messages, use the placeholder buttons underneath the text box to input placeholders such as #firstName#, #lastName# or #company# in the message. You can find the available placeholders by clicking on the + sign when "Scrape all available profile data" is checked.

Note: The real text replaced by the placeholder will count towards the total character limit, so leave some room for longer names in the message.
Choose your condition for sending messages
You have 3 options:
1. Send to all
Send the message to all the profiles you've given.2. Send only if the last message was from the recipient (Reply)
Only send the message in response to a user - meaning that if you were the last person to send a message in your thread, the message will not be sent.3. Send only if the last message was from me (Follow up)
Only send the message as a follow-up to a user - meaning that if the recipient was the last person to send a message in your thread, the message will not be sent.Launch your Flow
Last but not least: turn on your Flow! By default, your Flow is inactive. Simply "Enable" it:

Once you have, it'll launch automatically at the best times, continuously, with one goal in mind: to keep on top of new connections who have accepted your request or whose requests you have accepted so that you never miss a beat when it comes to sending out a warm welcome.
Keep track of your Flow's actions as they happen using the Flow's dashboard - the "Performance" tab will help you visualize your progress, whilst the "Connections" tab will break it down profile by profile.
 A preview of the results page for the Flow.


