
Tutorial
Index
- Use your Lead lists as input
- Select the GPT model you want to use
- Prompt the AI to write the type of comment that you want
- Specify the columns you want GPT to take the input from
- Select how the Phantom should use your input
- Finalize the setup by choosing your settings for the launch
- Use your AI-generated comments with LinkedIn Auto Commenter
Use your Lead lists as input
Leverage your Lead lists as input for the Phantom. If you do not have any leads in your lead list yet, use a LinkedIn Phantom that gathers Profile URLs such as the LinkedIn Search Export Phantom to populate your Leads page with leads.
You can also use a LinkedIn Profile URL of a lead that is already in your lead list.
Select the GPT model you want to use
Select which GPT model you want to use, GPT 3.5 or GPT 4.
GPT 4 is more powerful than GPT 3.5, but also uses up more AI credits. Selecting GPT 4 can use up to 30 times as many credits as GPT 3.5.

Prompt the AI to write the type of comment that you want
Select a prompt template or write your own
There are three pre written prompts in this section which you can use if your desired outcome is to:
Write a connection request message based on a recent post by your lead
Write a connection request message that pitches your product or service based on a recent post by your lead
Write a comment on a post that your lead has posted
You also have the option to write your custom script, if you have a different goal in mind.
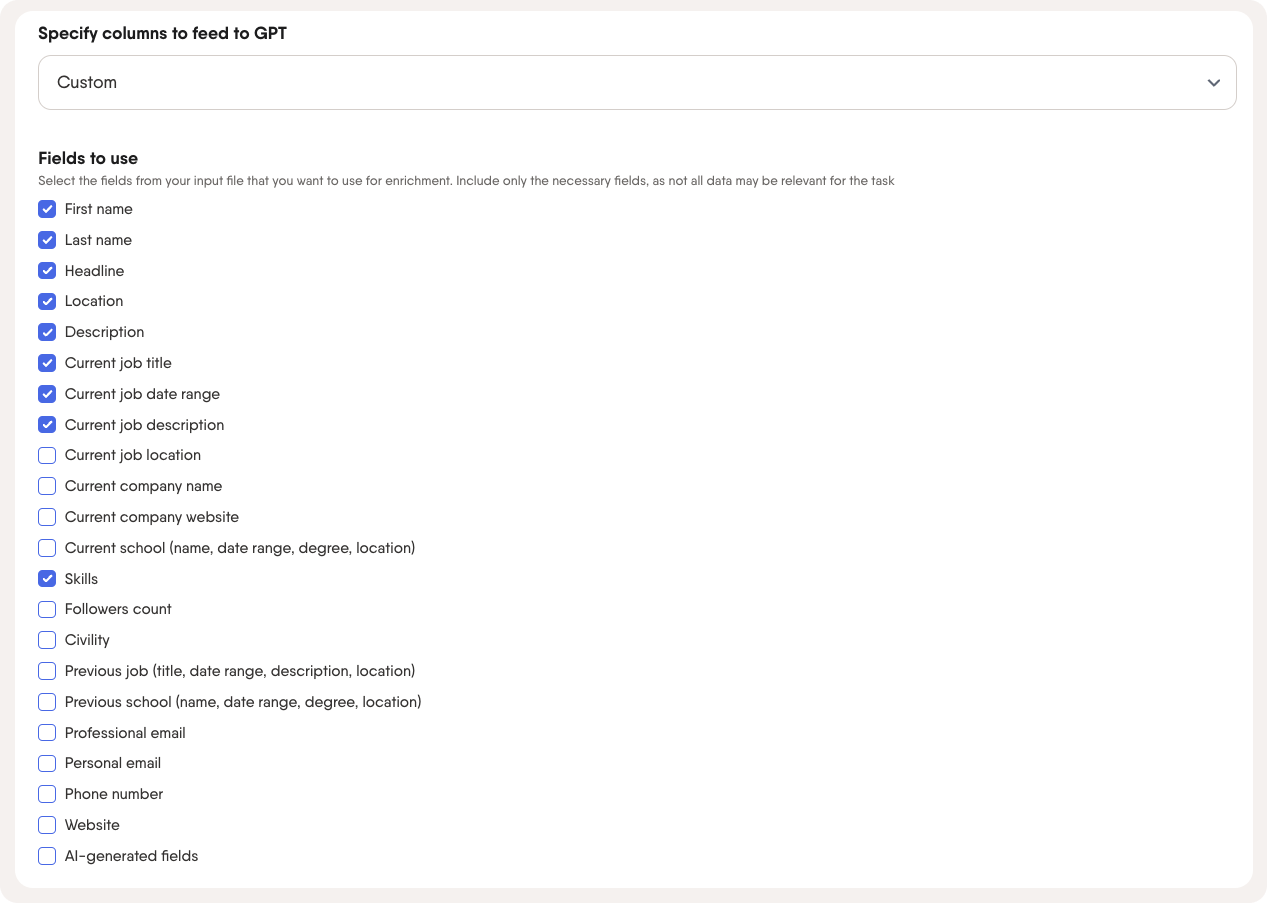
Specify the columns you want GPT to take the input from
We recommend sending all your available data to GPT for the best results, but you can also specify specifically which columns you want GPT to look at for the input. The columns you select here will be the only data input GPT has to base the response on. Make sure that the columns you select has the right information that GPT needs to create a valid output based on your prompt.
Select how the Phantom should use your input
If you have many leads in your Leads list, you may want to select to run the Phantom on only a few of them to try your prompt. In the Behavior section, you can select how the Phantom should behave.
Run prompts on first 10 leads (recommended for testing). This setting will give you an output for only the first 10 leads in your Leads list. If you select this, the Phantom can also re-run the same 10 leads to give you a different output if you wish to test a new prompt with the same Leads list
Run prompt on all leads. This will process all the leads in your Leads list
Run prompt on a select number of leads. This allows you to select the exact number of leads you wish to process at launch
Finalize the setup by choosing your settings for the launch
Launch
You can choose to launch the Phantom manually, repeatedly, or every time another Phantom finishes. Select the option that best matches your needs.
We recommend setting up repeated launches to have your Phantom constantly working in the background on your behalf!
Notifications
If you wish to be notified when the Phantom has launched Successfully or if there was an error, you can select the settings here. Under "Advanced settings", you can connect to your Slack account if you want to be notified on Slack instead of by email.
Advanced settings
Under "Advanced settings", you can choose to use a proxy to mask your digital footprint. You can also set limits on the amount of execution time the Phantom is allowed to use, select if it should not run in parallel with other Phantoms, and limit the number of maximum retries if the Phantom runs into an issue.
Use your AI-generated comments with LinkedIn Auto Commenter
Once your AI LinkedIn Post Responder Phantom has finished running, you’ll have a results file containing AI-generated comments for each profile. You can use these comments to automatically reply to your leads’ most recent LinkedIn posts using the LinkedIn Auto Commenter Phantom.
Here’s how to do it:
Export your results to Google Sheets:
Your results file will contain a column called ai_message, where the generated comments appear.
Export this file to Google Sheets manually or dynamically. You can follow this guide: How to export data to Google Sheets.
Set up the LinkedIn Auto Commenter
Open the LinkedIn Auto Commenter Phantom.
Paste the link to your Google Sheet in the input step.
In the setup:
Select the column containing the LinkedIn post URLs
Select ai_message as the column containing the commentsComplete the rest of the setup and launch the Phantom.
Each lead will receive a personalized, AI-written comment posted to their most recent LinkedIn activity.
Note: The AI LinkedIn Post Responder only writes comments for posts published in the last month. If a profile has only older posts, you’ll see the message: "No posts found on that profile's last activity."


