Tutorial
Index
- Choose what to extract
- Choose the LinkedIn account you want to use
- Customize your invite message
- Set-up automated follow-ups
- Choose how many invites to send per day
- Advanced settings [Optional]
- Launch your Workflow
- Filter your results and launch outreach
- Tabs & Key metrics
- Pause, edit or delete your Workflow
Choose what to extract
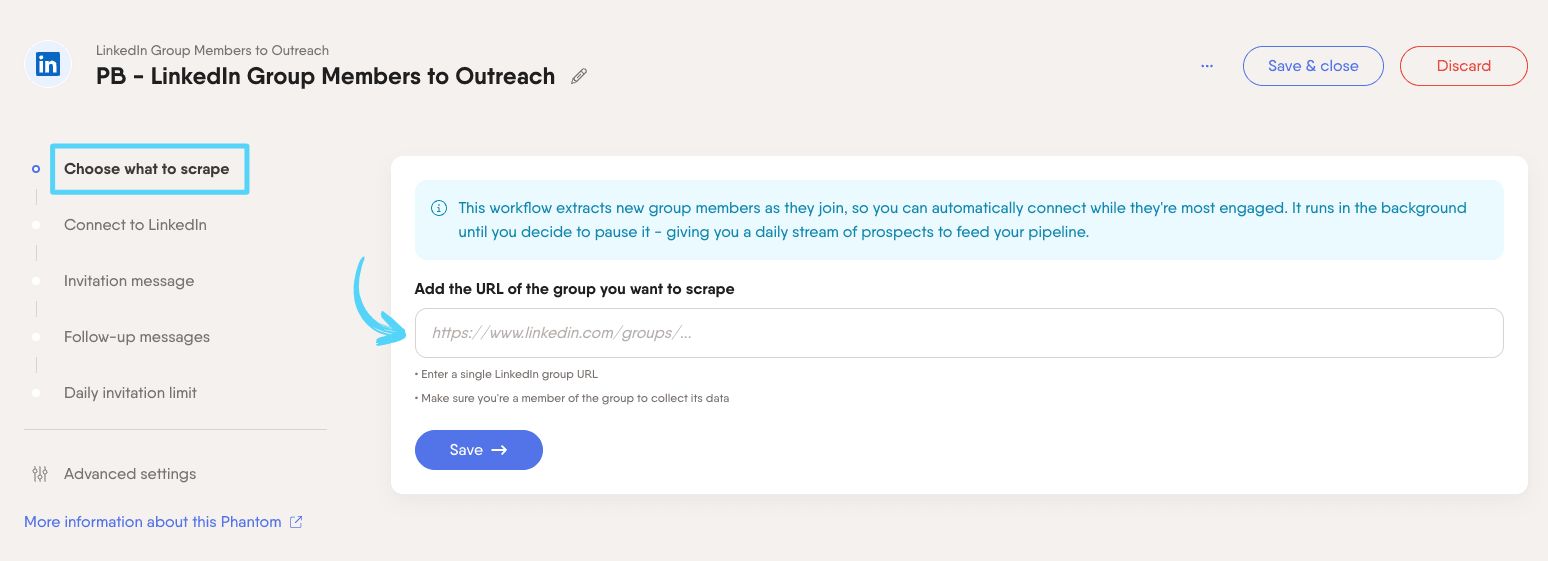
Select the source you want to extract. In this workflow, the source should be a LinkedIn group URL.
You must to be a member of the group, as this is required to access its member information.
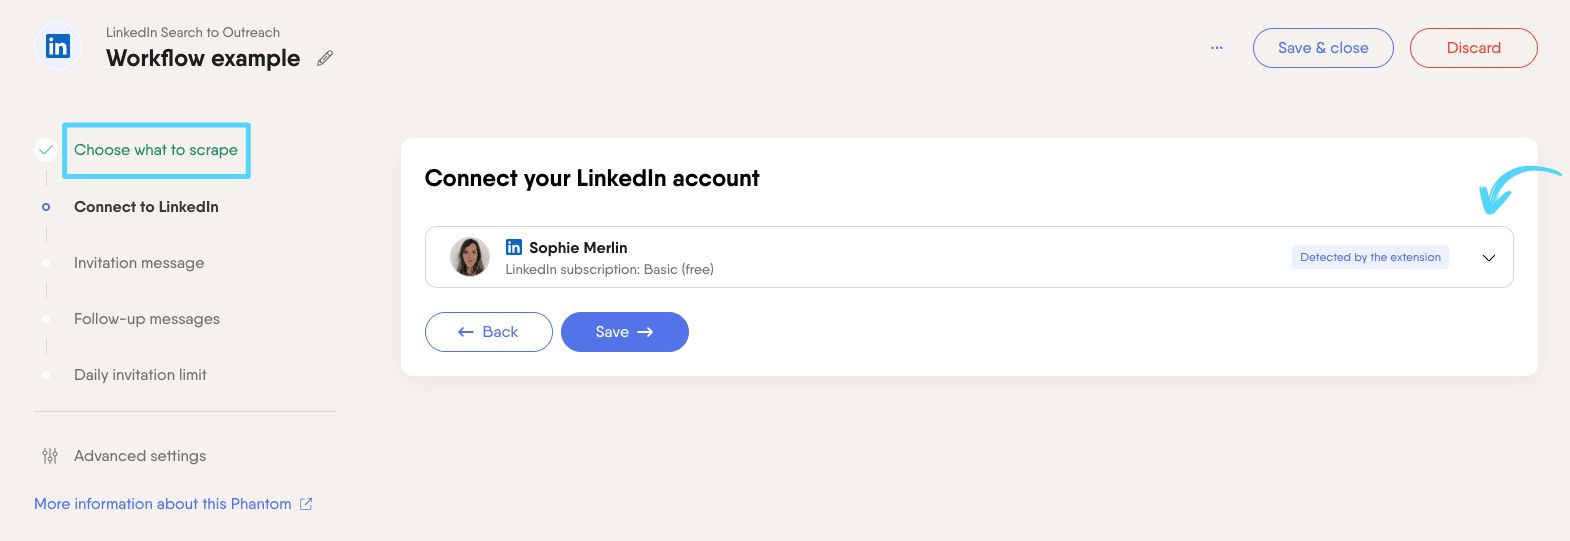
Choose the LinkedIn account you want to use
Use the drop-down menu to select your own or a teammate’s LinkedIn account:
Customize your invite message
Make your connection requests stand out by adding a short, friendly message (up to 300 characters). This step is optional but a personalized note helps build trust and increases your chances of connecting with leads.
1. Tick the “Customize your LinkedIn connection request message” box to open the message composer.
2. Write a natural, conversational message. Keep it short and simple.
3. Use placeholders like #firstName# to personalize your message instantly. Just click to insert!Example: Hey #firstName#, let’s connect!
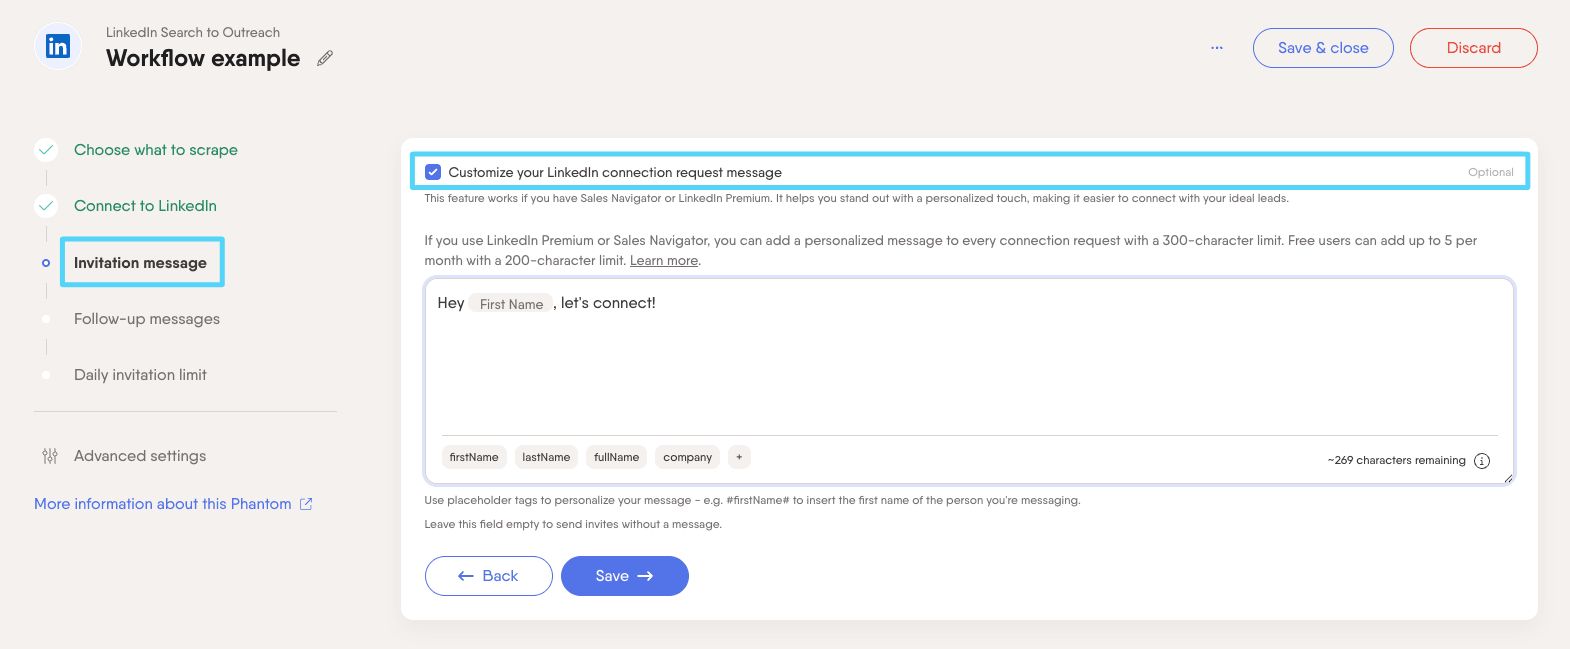
This feature works if you have Sales Navigator or LinkedIn Premium. With a free LinkedIn account, you might be restricted to 200 characters and 5 personalized invites per month.
Set-up automated follow-ups
Keep the conversation going with up to 3 personalized follow-up messages, automatically sent after your invite is accepted. Just set the timing, PhantomBuster takes care of the rest.
This step is optional.How to set it up:
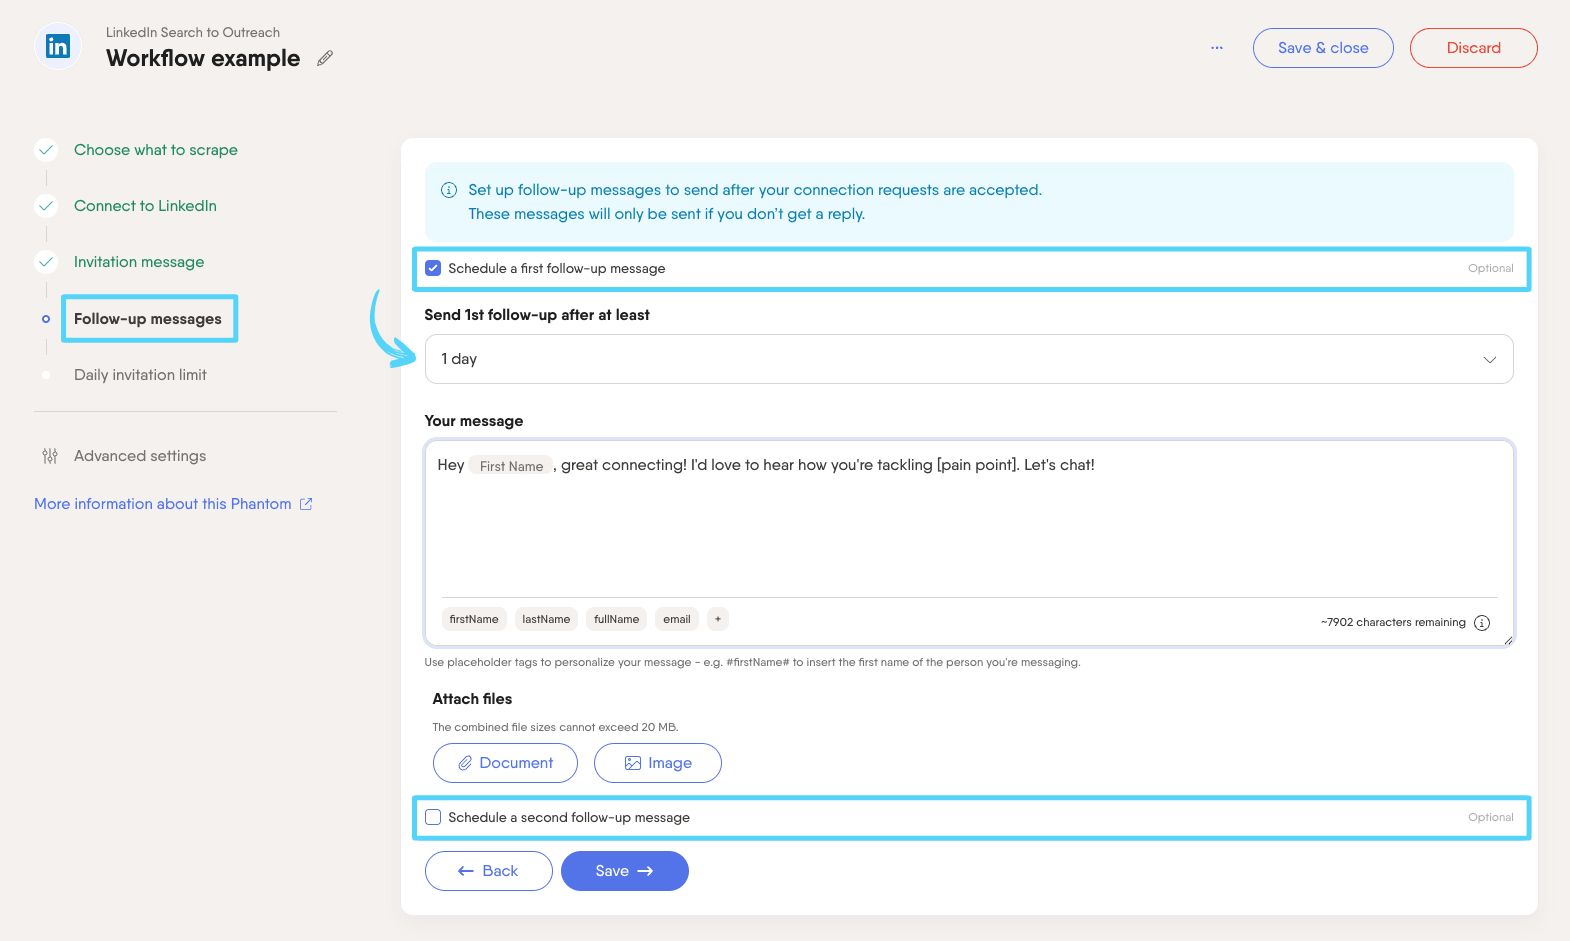
1. Tick the box: “Schedule a first follow-up message” to open the message composer
2. Use the “Send 1st follow-up after at least” dropdown to choose when your message should be sent
3. Write your follow-up message. Keep it relevant and personal.
4. Want to send more? Tick “Schedule a second follow-up message” and repeat the process. You can schedule up to 3 follow-ups total, which are only sent if the person has not replied.You can adjust at any time. Start without follow-ups and add them later. Once enabled, messages will go to everyone who has not responded yet.
Make your messages personal
Boost your response rate by using custom placeholders to tailor your message.
Available placeholders: #firstName#, #lastName#, #company#
Click on a placeholder below the text box to insert it instantly.
Example: Hey #firstName#, great connecting! I’d love to hear how you're tackling [pain point]. Let’s chat!
Remember, the right message at the right time = more responses.
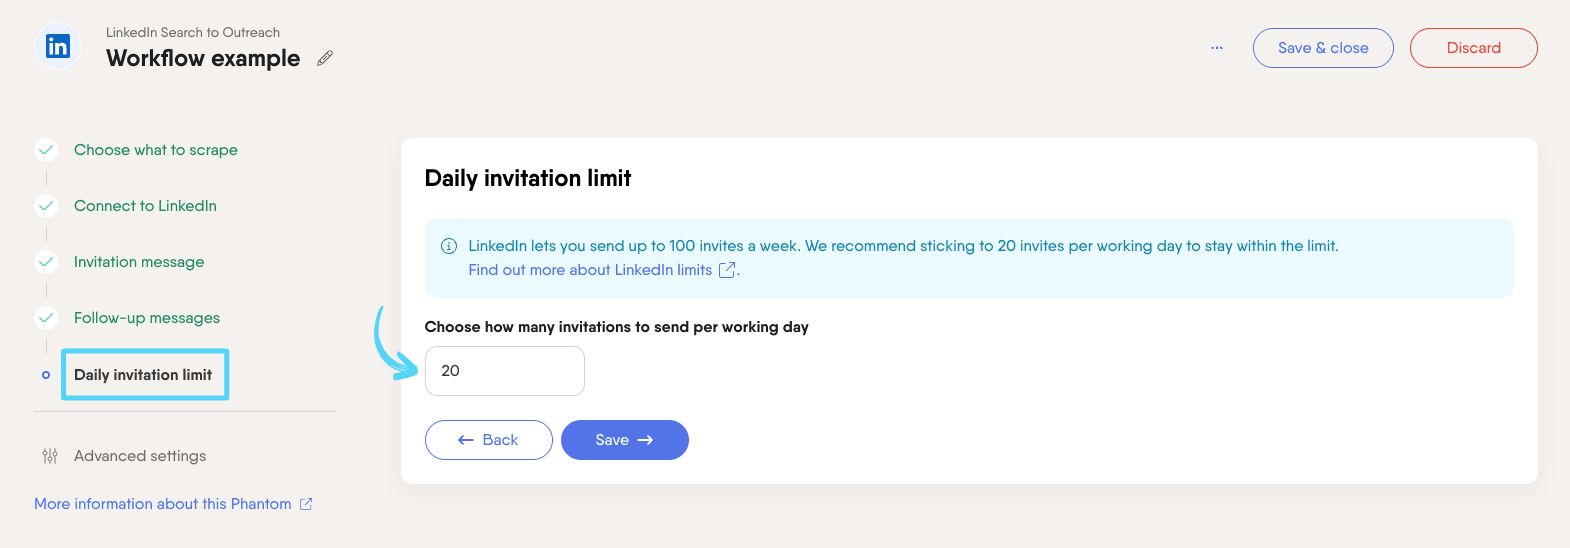
Choose how many invites to send per day
We recommend sending 20 invites per working day as LinkedIn has a limit of 100 per week. You want to mimic your automations with how you would normally use LinkedIn to look as natural as possible.
The working hours are determined based on the timezone your account is set to.
Advanced settings [Optional]
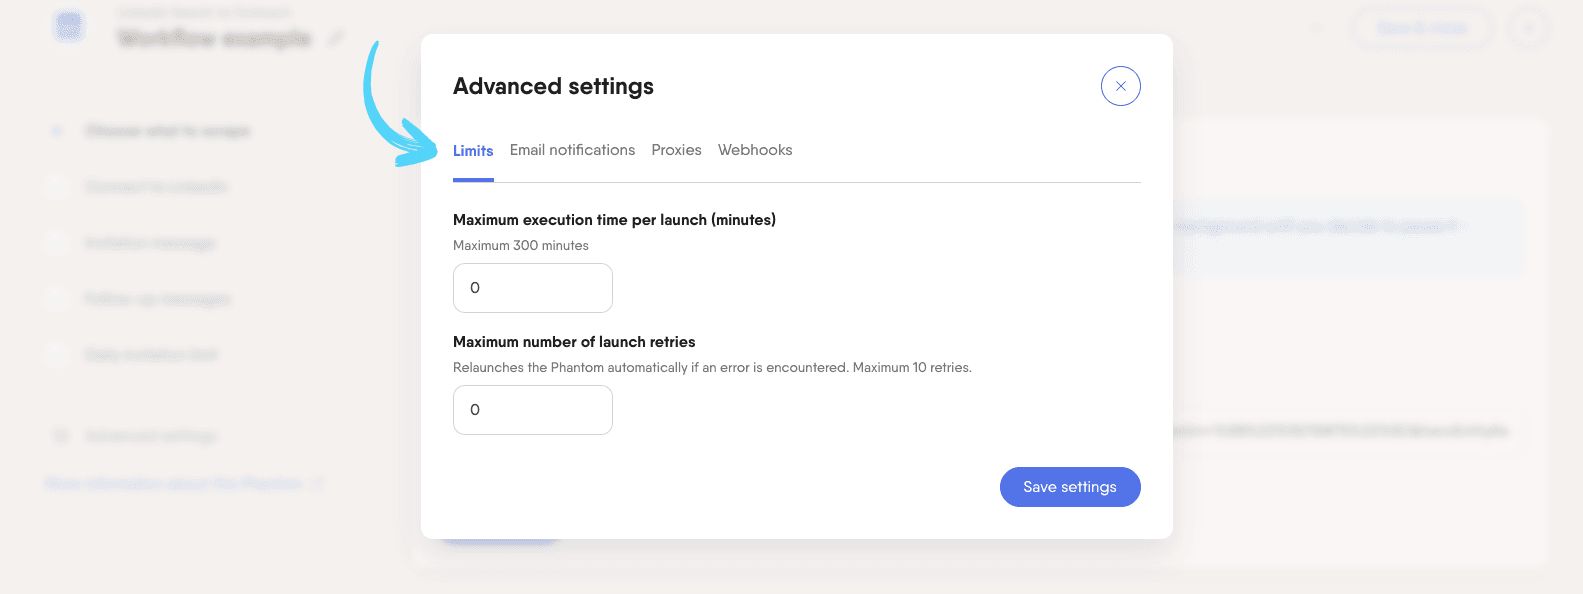
The Advanced settings allow you to customize your Phantom’s behavior before launching. These settings are optional and can be adjusted based on your goals.
Set limits:
- Define execution time: Enter how long (in minutes) the Phantom should run per launch, up to 300 minutes.
Example: Enter “30” to stop the Phantom after 30 minutes.
- Set retry attempts: Enter how many times the Phantom should retry a launch if it fails, up to 10.
Example: Enter “3” to allow 3 retries.Enable email notifications:
- Choose whether to receive email alerts for successful and/or failed launches.Set up a proxy
- Use a proxy to run your Phantom from a consistent IP address.
Note: Proxies are turned off by default, enable and configure one if your use case requires it.Add webhooks
- For Slack: Paste a Slack webhook URL to send notifications to a Slack channel.
- For other tools: Use a custom webhook URL to connect with your API or external systems.
Launch your Workflow
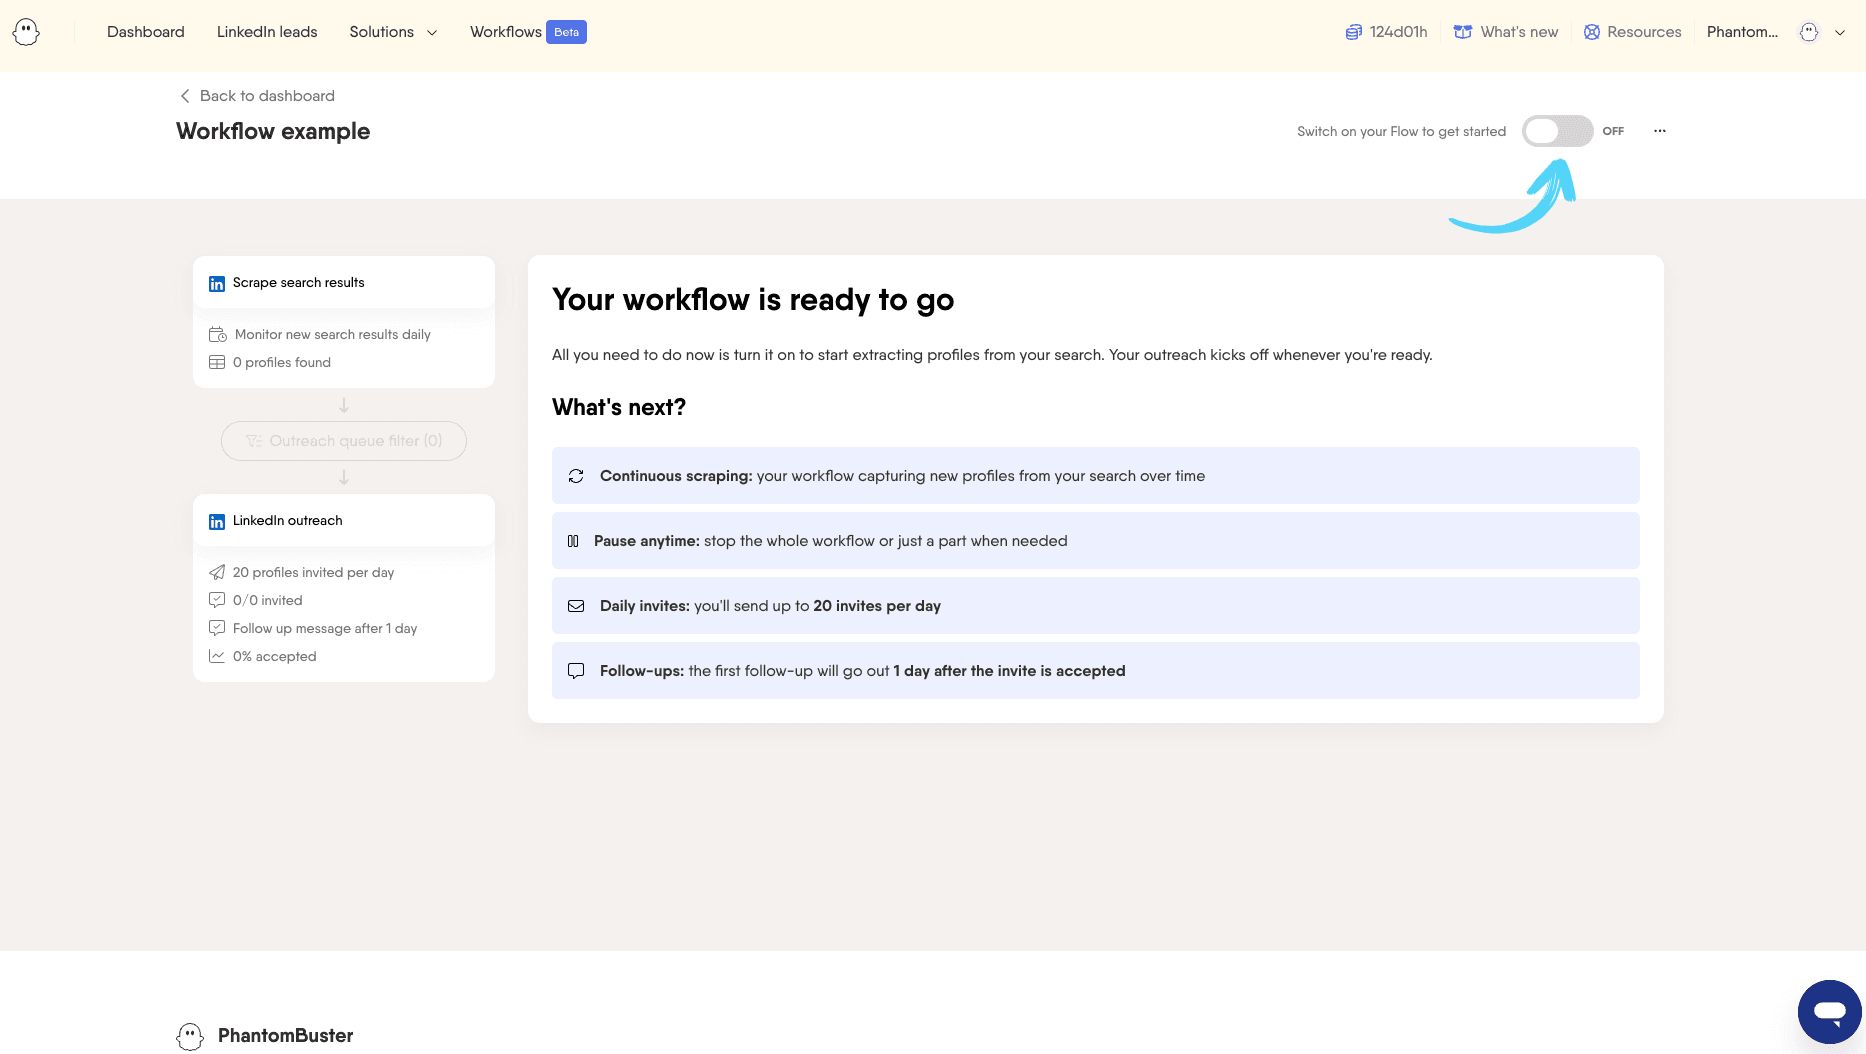
When you are ready, click the toggle to turn your workflow on.
Filter your results and launch outreach
Now you are presented with the results from your scrape, this is the first part of your workflow.
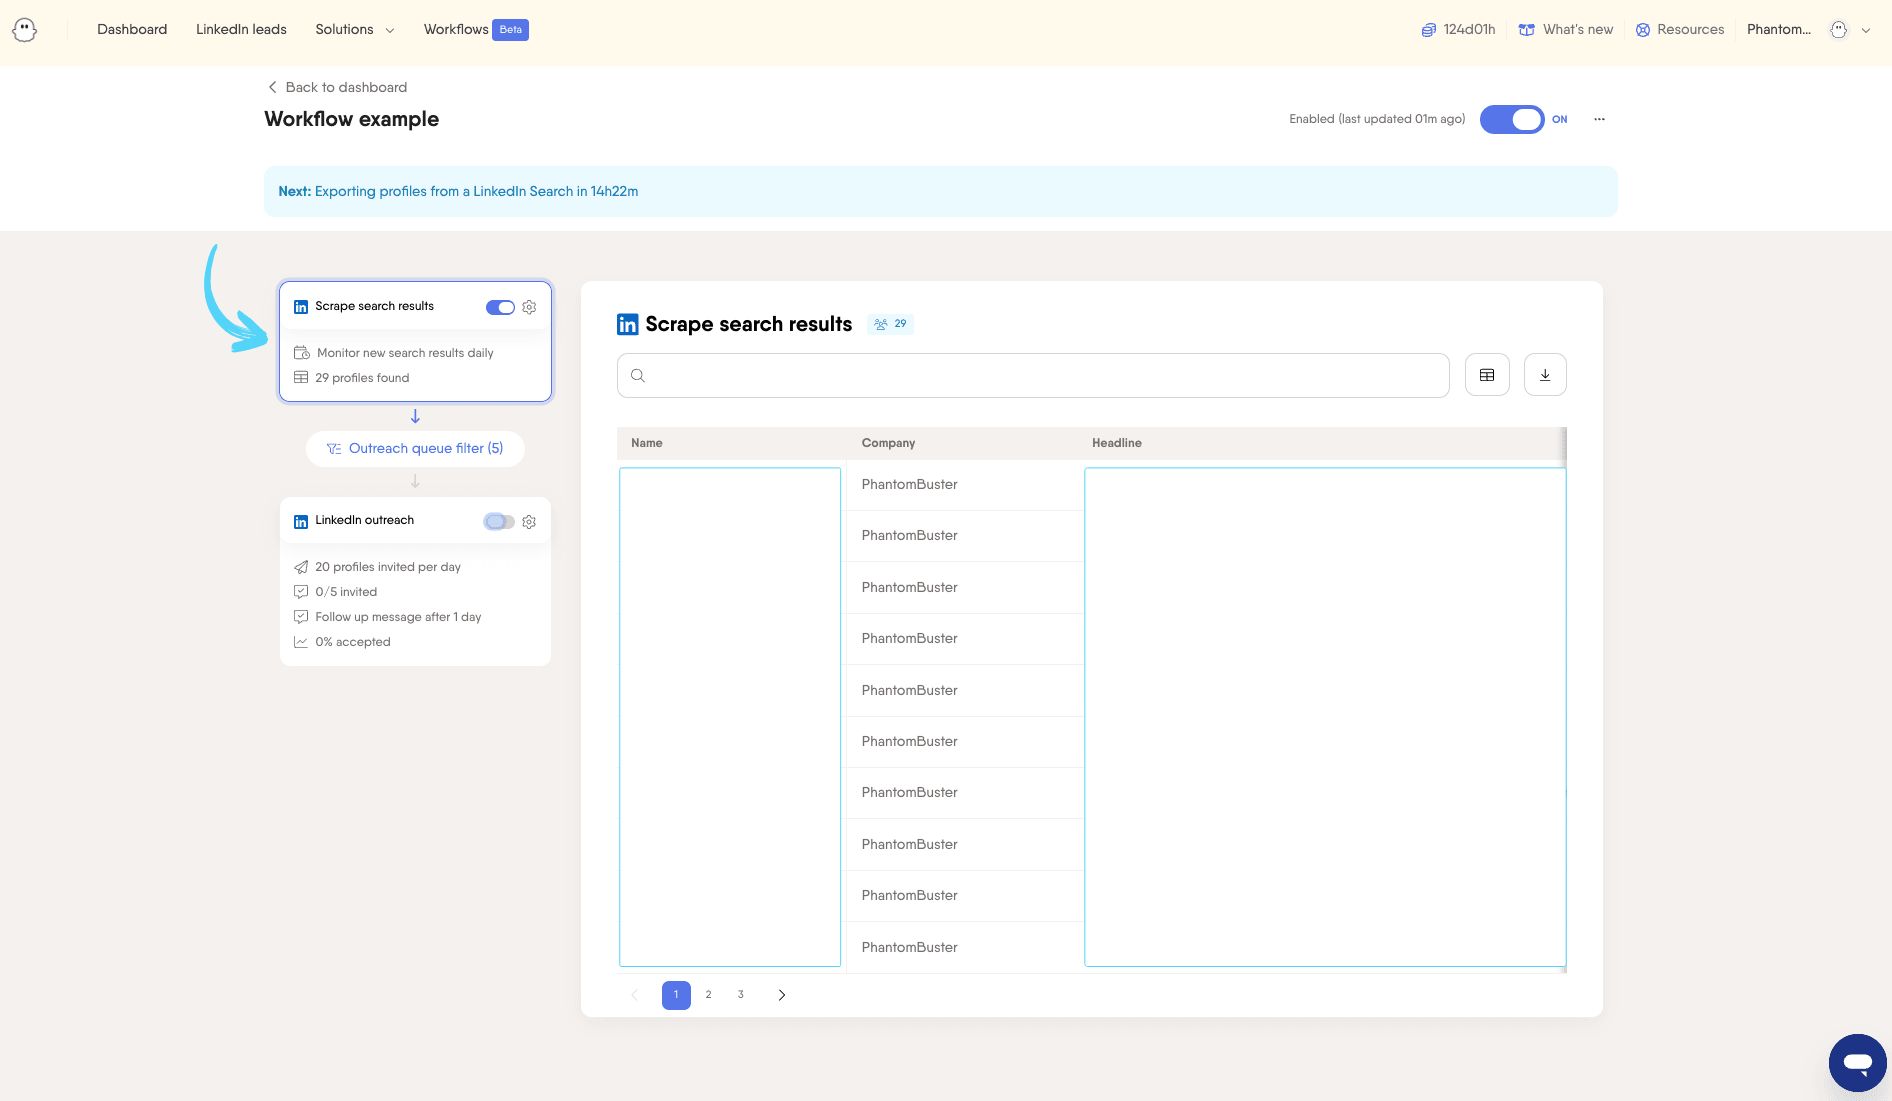
At this stage, you have the option to filter your results using the “Outreach queue filter." This lets you fine-tune your lead list to better match your Ideal Customer Profile (ICP).
(This step is optional but helpful for more targeted outreach.)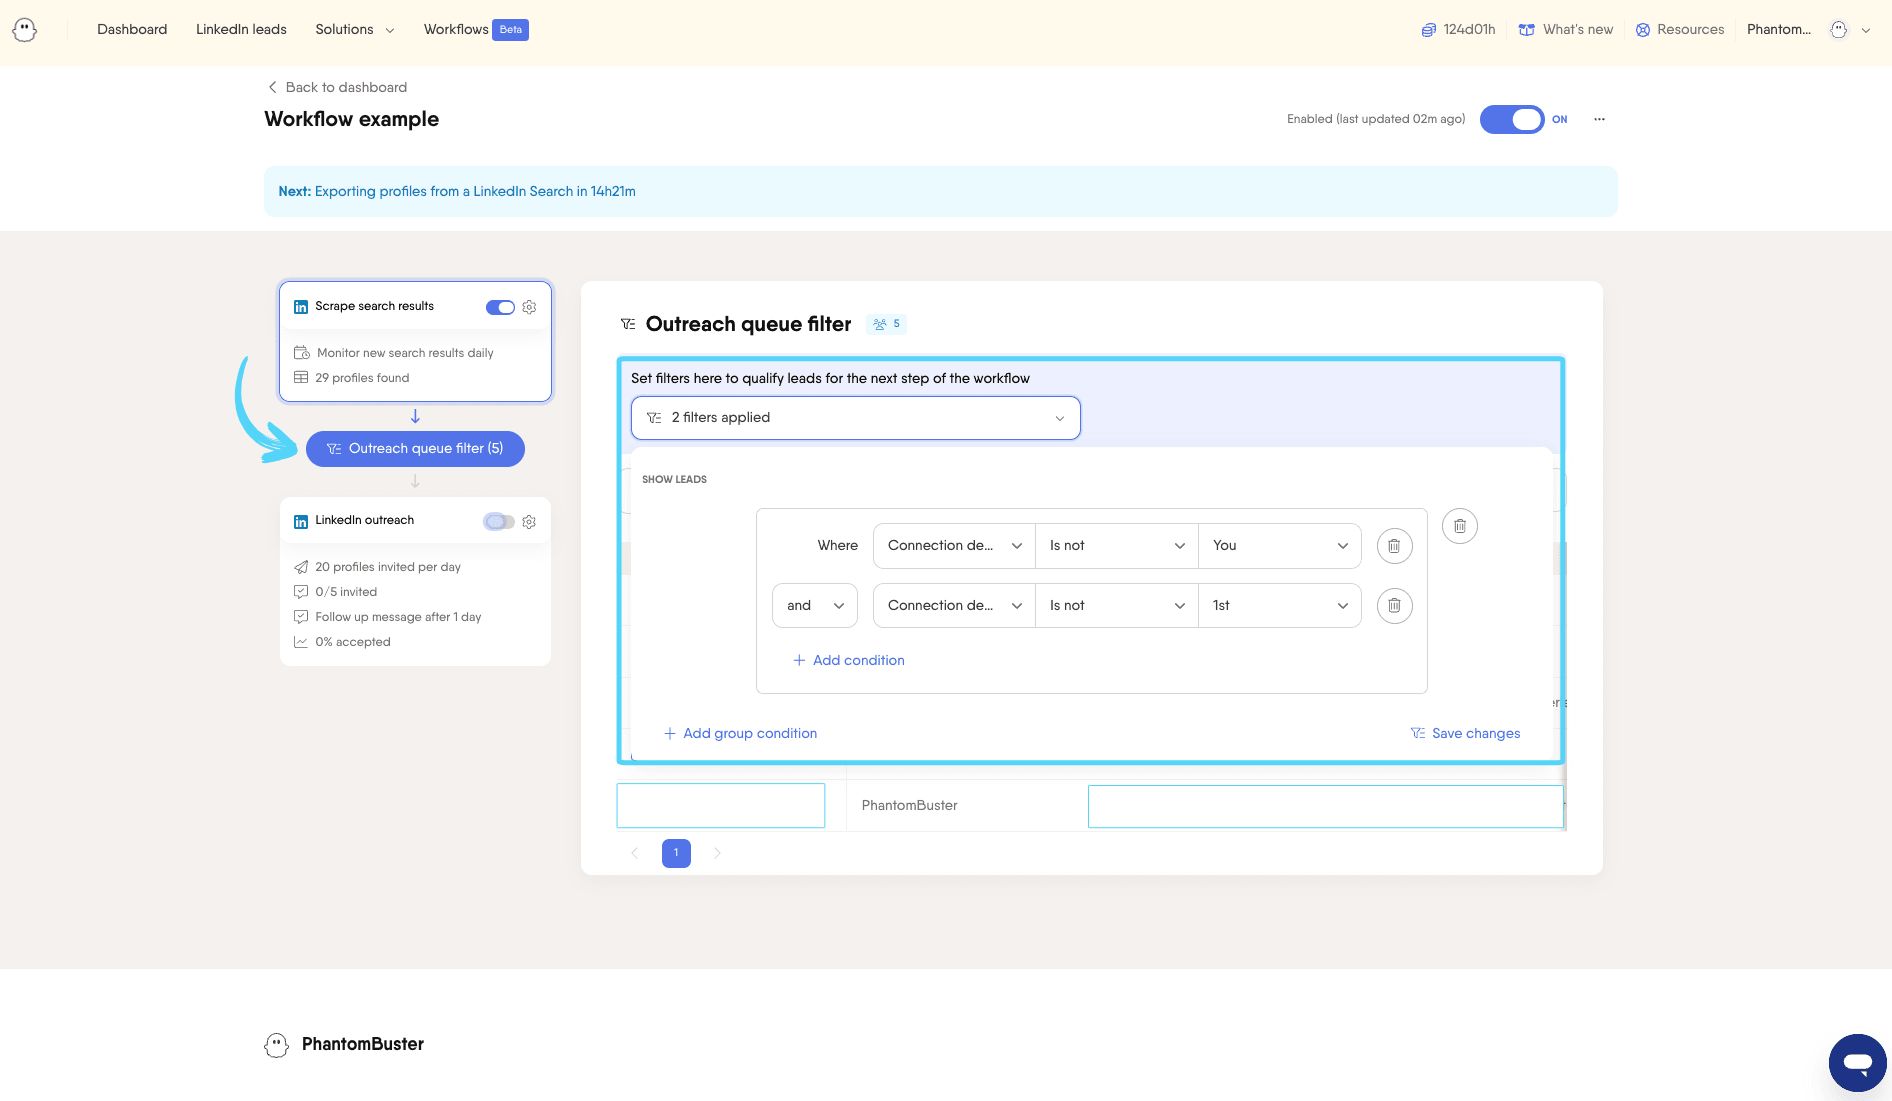
Once you're happy with your filtered list, it's time for the second part: launching your LinkedIn outreach.
Just toggle it on, and PhantomBuster will take it from there.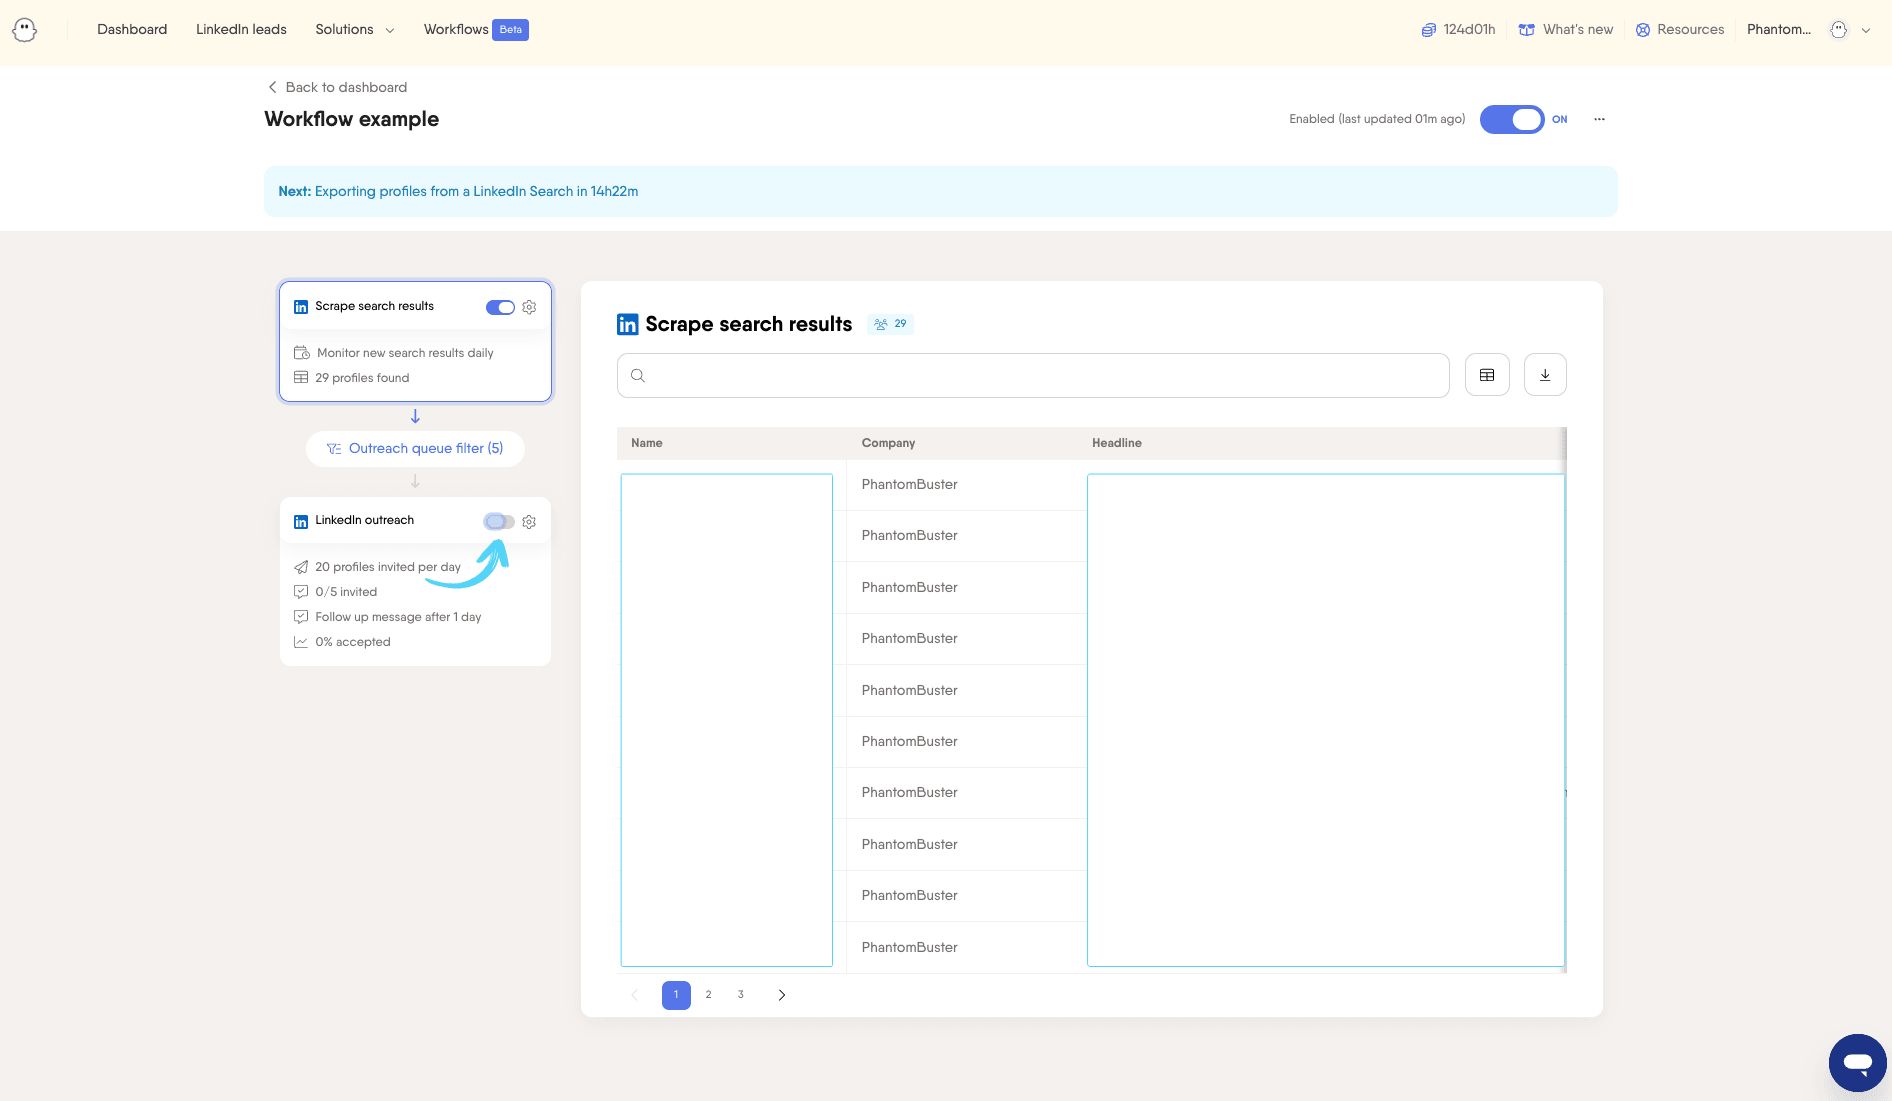
You’re all set, time to start connecting!
Tabs & Key metrics
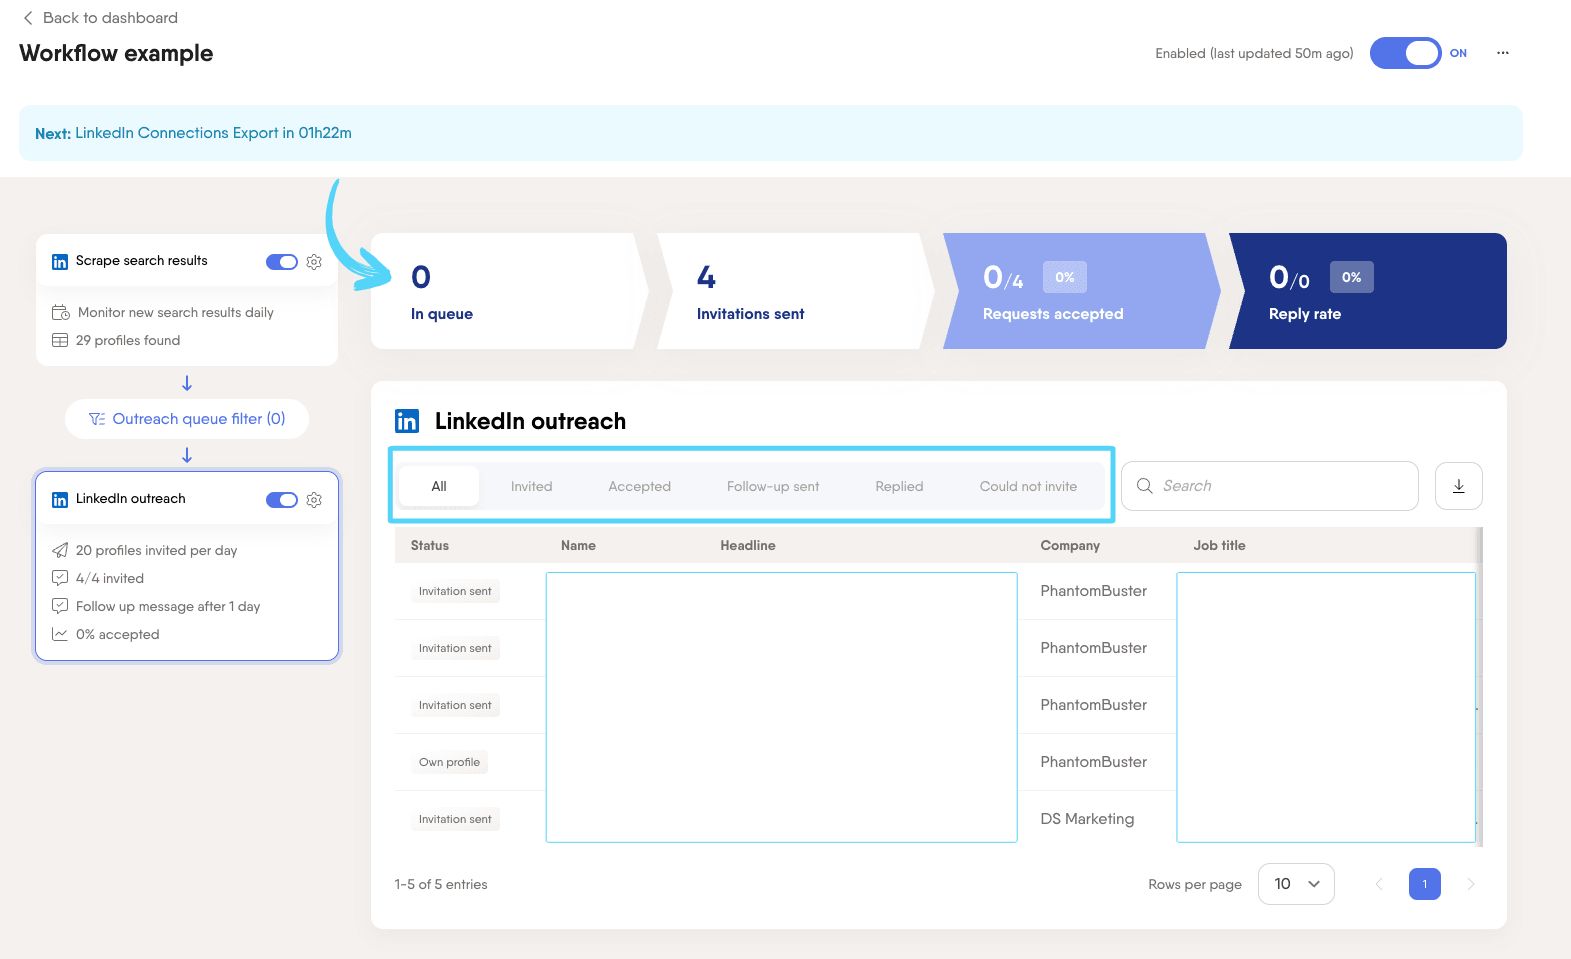
This section displays the results of your LinkedIn outreach in real time.
You can easily track:How many invitations were sent
How many were accepted
Follow-up message(s) sent
Replies received
Cases where sending an invite was not possible
Pause, edit or delete your Workflow
You can manage your workflow directly from your Dashboard:
Pause: Toggle the switch on your workflow to pause it at any time.
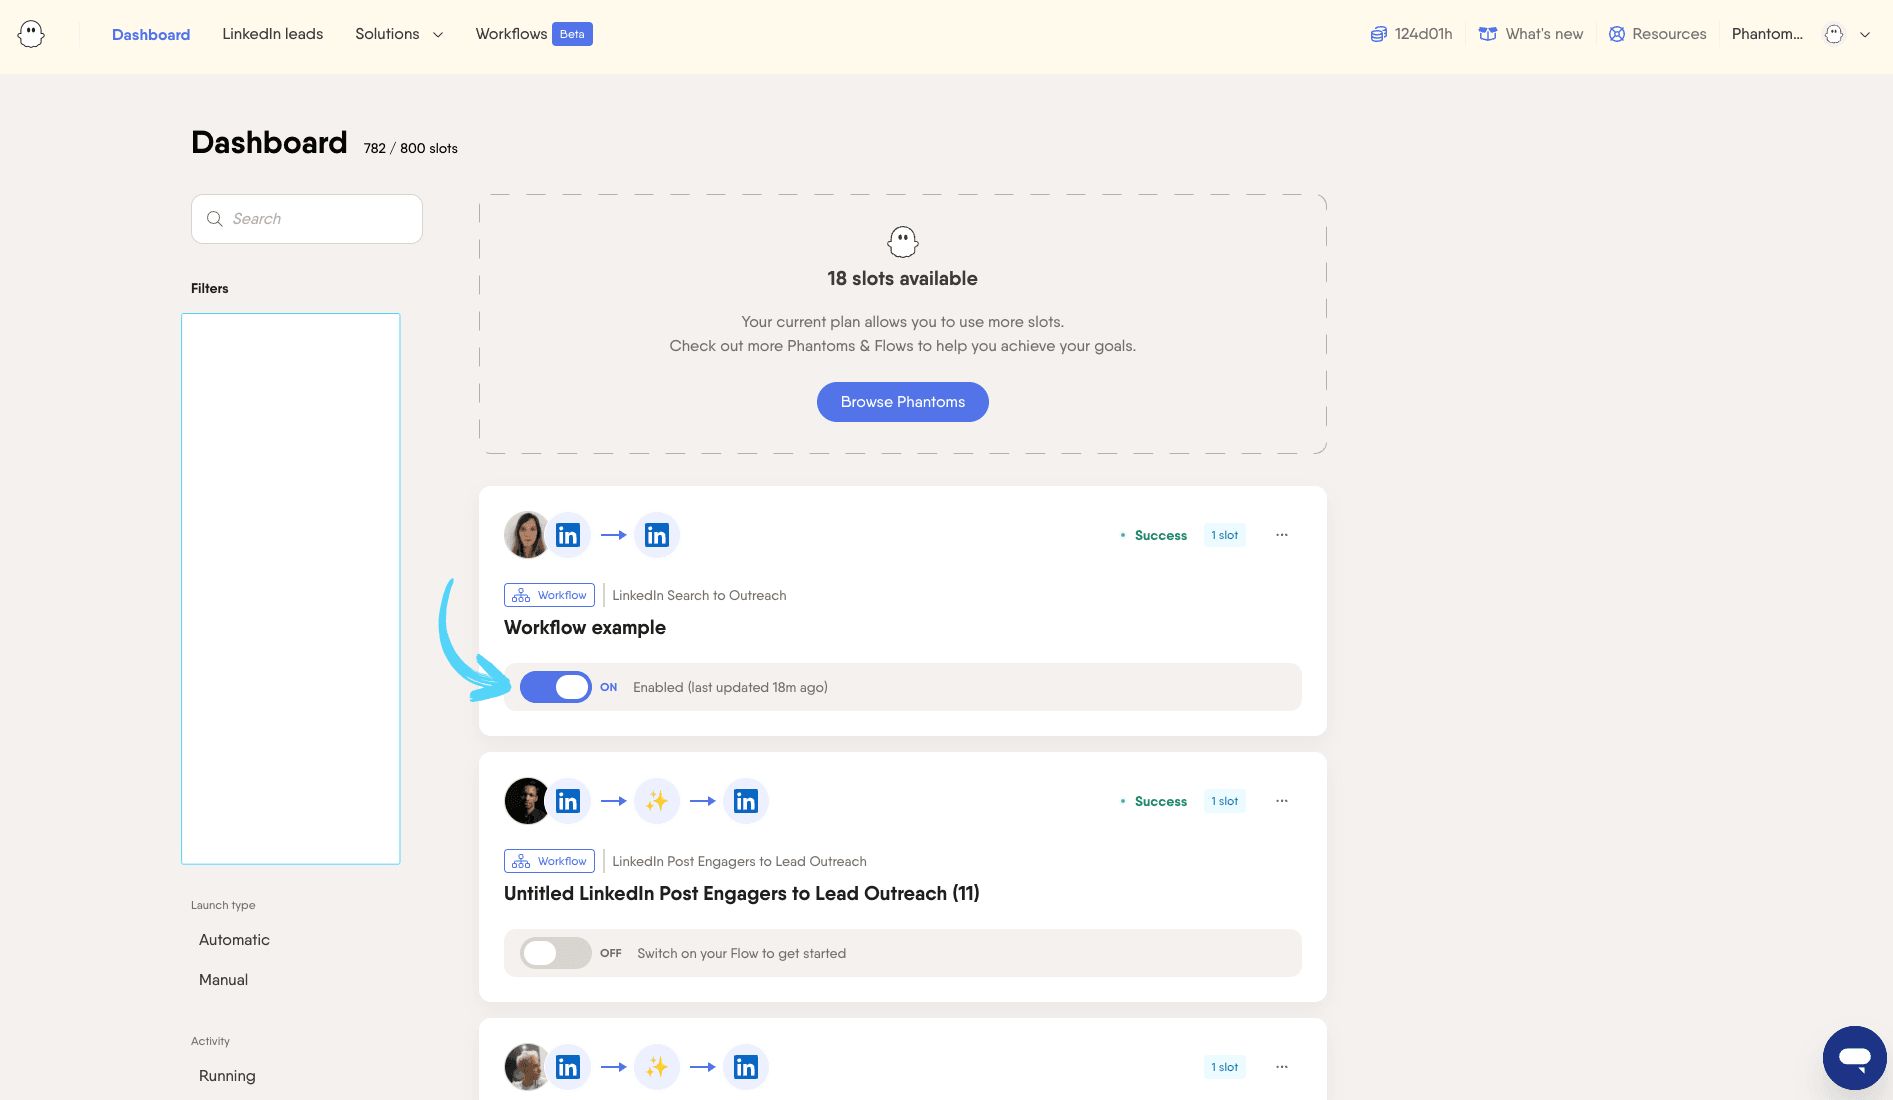
Edit or Delete: Click the three-dot menu on your workflow to edit settings or delete it entirely.
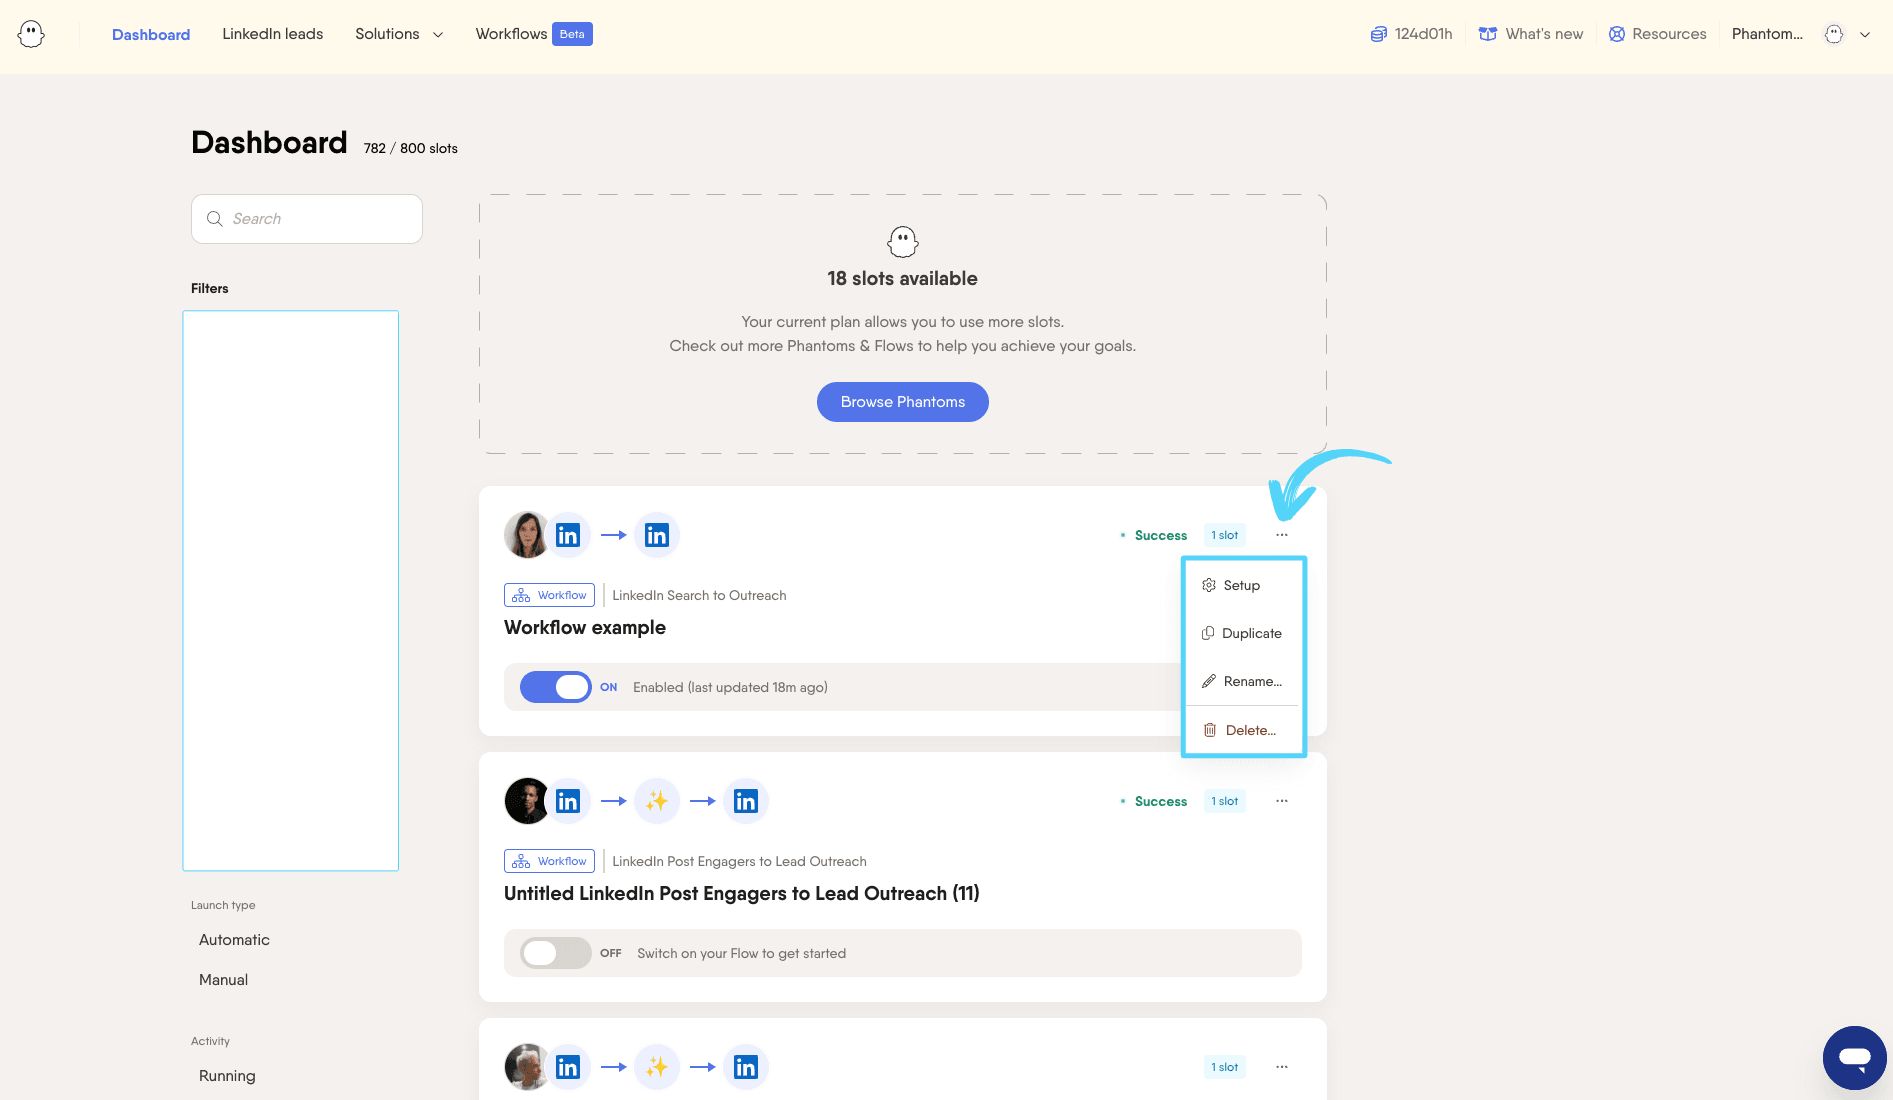
Stay in control and make changes whenever you need, your workflow is always just a click away.
