
Tutorial
Index
Setup summary
Here's a tutorial to help you set up the HubSpot CRM Enricher:
Connect to HubSpot using an access token
To take action on your behalf, this Phantom needs to access your HubSpot account. To do this, it needs a private app access token from your HubSpot. Here's how to find one:
Click on the settings icon in the main navigation bar of your account
In the left sidebar menu, select Integrations > Private Apps
If you haven't already, you will need to Create a private app, name it as you prefer, and define the Scopes -
Under CRM, check both Read and Write for the following 4 scopes:
- crm.objects.companies
- crm.objects.contacts
- crm.schemas.companies
- crm.schemas.contacts
- crm.objects.owners.read
Under Standard, check Request for:
- crm.importClick Create app to reveal your access token, then show it, copy it, and paste it into the "Connect to HubSpot" step of the Phantom's setup
For more detailed instructions, check out this HubSpot article.
Take note: API keys can no longer be used to connect to HubSpot from November 30th 2022.
Provide a file containing enriched contact or company data
Choose which data type you'd like to export to your CRM: individual contacts or company entities.
Then, to export your list of contacts or companies, you have two options:
1. Use a spreadsheet containing your data
Create a spreadsheet with Google Sheets. Make this spreadsheet public so PhantomBuster can access it.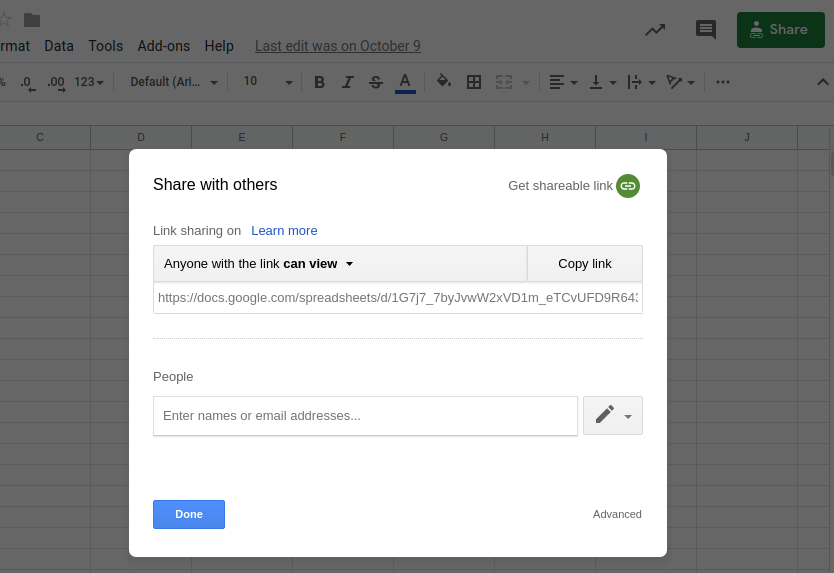
Copy the spreadsheet URL and paste it into your Phantom's setup.
2. Use data extracted by another Phantom
You can select the results file of any of your previously launched Phantoms by clicking on the "My Phantoms" tab, then choose the file you want from the dropdown menu.Map your data to specific HubSpot properties
Next, you will need to connect the HubSpot properties listed to the corresponding columns in your input spreadsheet - email, fullName, company, etc. For example, if you have stored all of your contacts' emails in a column named "emailAddresses", you should select that column here.
Under "More properties" you'll have some additional options.
Add more properties
To add more properties of your choice that you don't see listed, you can use this section by finding the internal name for the HubSpot property you want as follows:
Go to your account Settings > Properties
At the top of the page, beside Select an object, choose Contact properties OR Company properties
Find the relevant property or create a new one
Click on the property, then </>
Copy the internal name
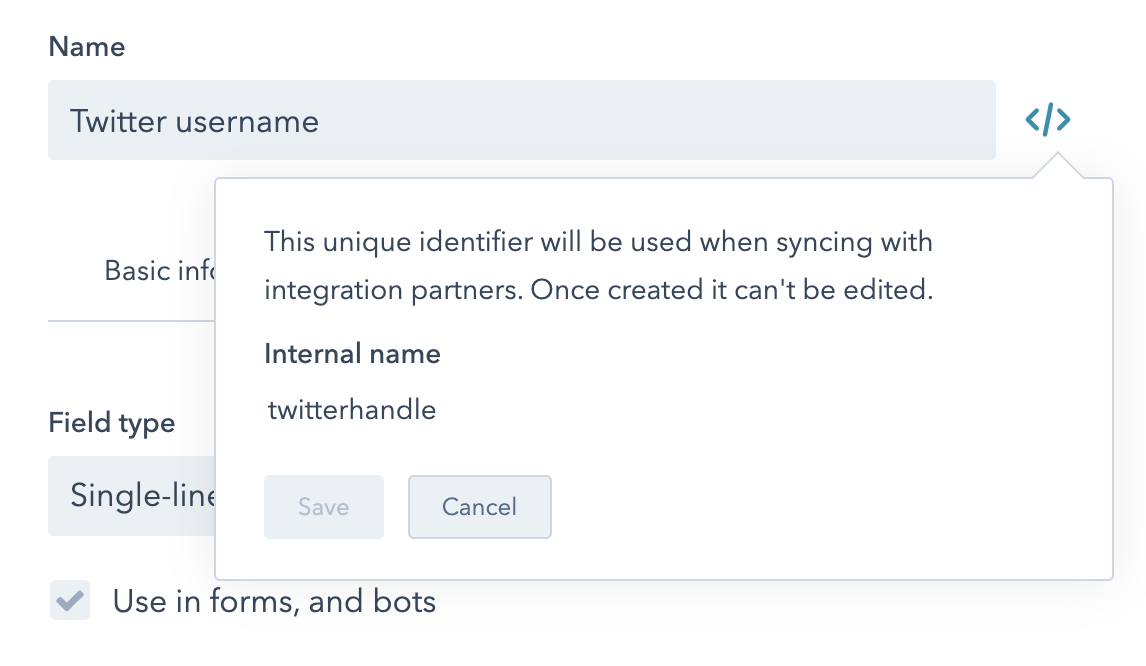
Paste this into the Phantom's setup with the corresponding cell in your input spreadsheet like so:
twitterhandle: twitter
linkedinurl: linkedinProfileUrl
Add a lead source tag (contacts only)
Here you can decide which of your contacts you would like to add the lead source tag "PhantomBuster" to.
Add a contact/company owner
Here you can decide if you would like to fill in the "Contact owner" or "Company owner" column for your entries with a specific member of your team on HubSpot by giving their user ID, found as follows:
Go to your account Settings > Properties
At the top of the page, beside Select an object, choose Contact properties OR Company properties
Search for the owner property - Contact owner or Company owner
Click on the property to find the list of users on your account, and find their subsequent IDs in the Internal value column
Copy the corresponding ID of the user who you would like to assign as owner of your entries
Choose to create new or update existing entries in your CRM
In the "Behavior" step, you can select how you would like the Phantom to manage your contact or company list from the 3 options in the dropdown menu:
Only create new entries
Only update existing entries
Both create new and update existing entries
Launch the Phantom to migrate your data
Select whether you wish to launch your Phantom manually or repeatedly.
If you select repeatedly, you can choose how frequently you wish to update your CRM. For more automatic launch options, click on the three little dots in the top right and "Show advanced settings."
To update your CRM automatically when collecting new data with another Phantom, select the "Every time another Phantom finishes" option and choose which Phantom you would like your CRM Enricher's launches to follow.
Don't forget to click "Save" on your setup, then the final thing you need to do is launch your Phantom by clicking the "Launch" button (if you've chosen to do so manually), or sit back and let your launches happen while you're away.
Your data will automatically become available within your CRM in seconds!


