Tutorial
Index
Connect your HubSpot account
Authorize PhantomBuster to access your HubSpot account. Once you’ve connected your account, you won’t need to repeat this step with other HubSpot Phantoms.
Select a list of HubSpot contacts
Choose the list of your HubSpot contacts you want to engage with on LinkedIn.
Write, customize, and schedule up to 3 follow-up messages
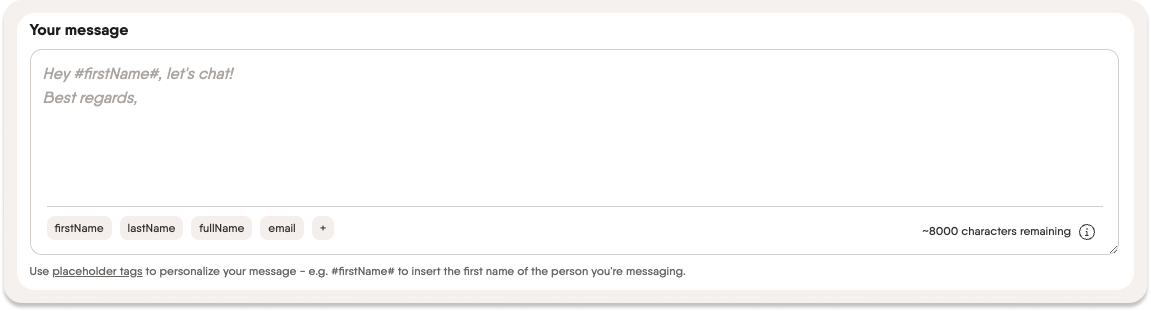
This section allows you to automatically greet your new connections in a personal way with messages of up to 8000 characters on LinkedIn and Sales Navigator.
Setting up your Flow with follow-up messages
1/ Write the message of your choice.
2/ The message will be sent once the user has accepted your connection request.
3/ You can schedule up to 3 more follow-up messages at the time intervals of your choice. These messages are only sent if the recipient does not reply to the prior message—so if a user replies to your message at any point, no further follow-up messages will be sent.Adding follow-up messages after you set up your Flow
You might want to set up your Flow without follow-up messages to start with and add them later. In that specific case, once you activate the follow-up messages, your Flow will send follow-ups to everyone who hasn't replied to the messages.Personalizing messages
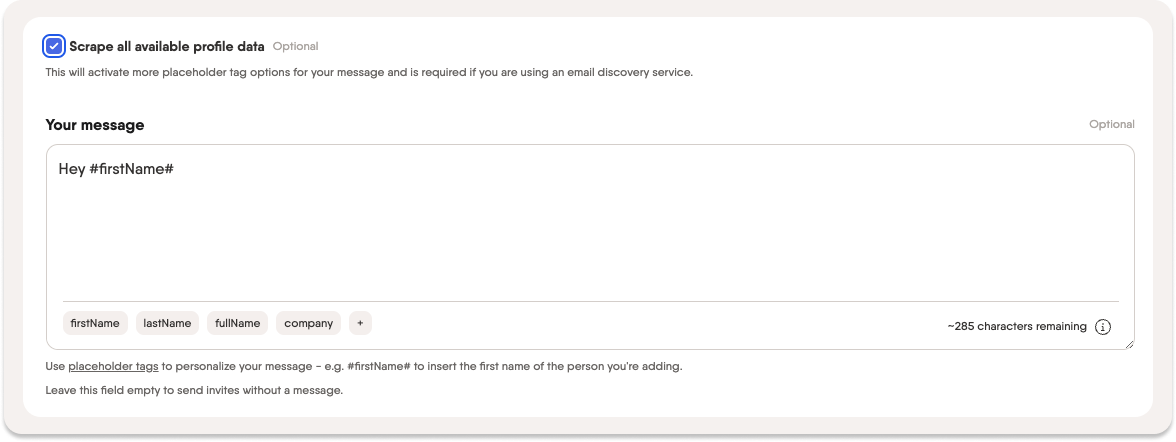
To personalize your messages, use the placeholder buttons underneath the text box to input placeholders such as #firstName#, #lastName# or #company# in the message. For LinkedIn messages, you can find the available placeholders by clicking on the + sign when "Scrape all available profile data" is checked.
LinkedIn
Sales Navigator
Use placeholders to personalize messages on Sales Navigator
Note: The real text replaced by the placeholder will count towards the total character limit, so leave some room for longer names in the message.
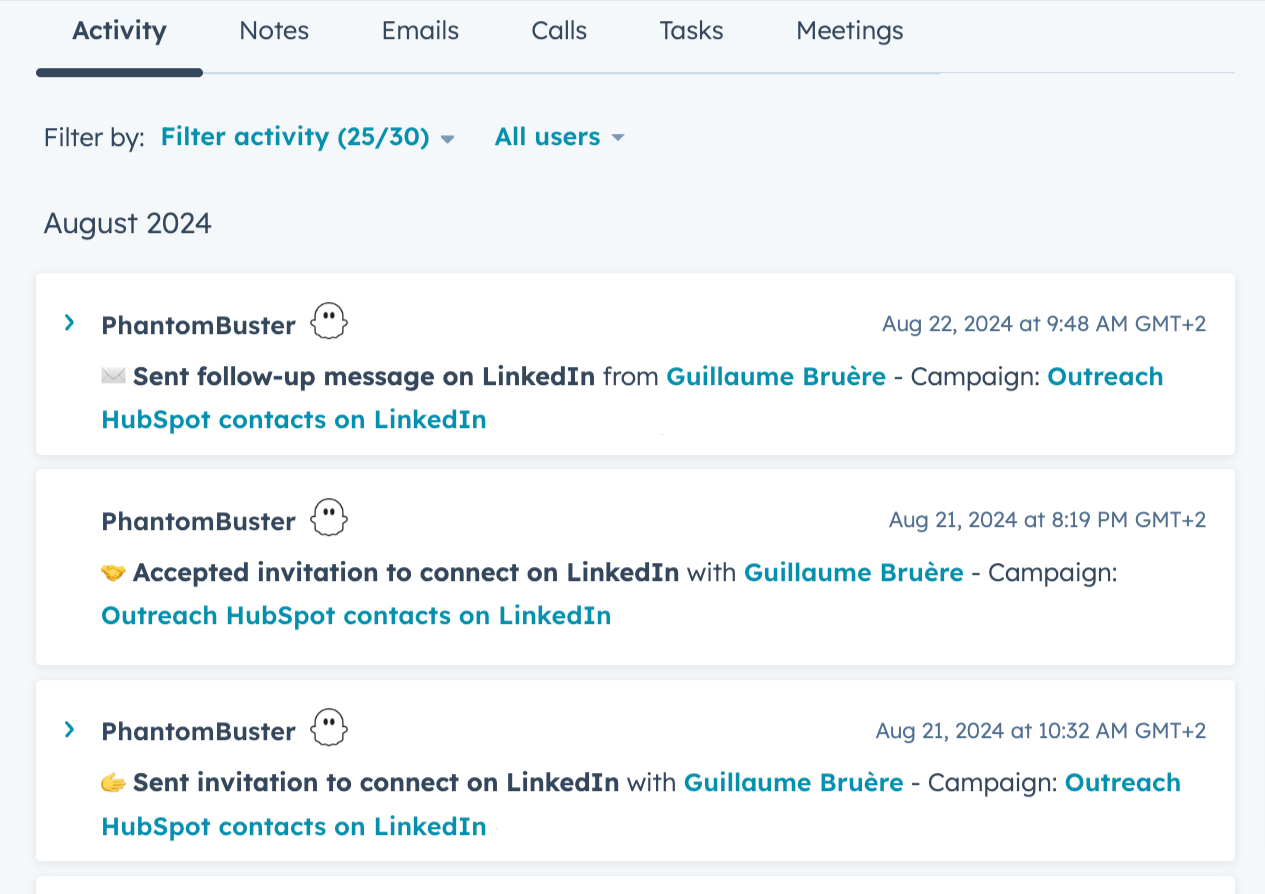
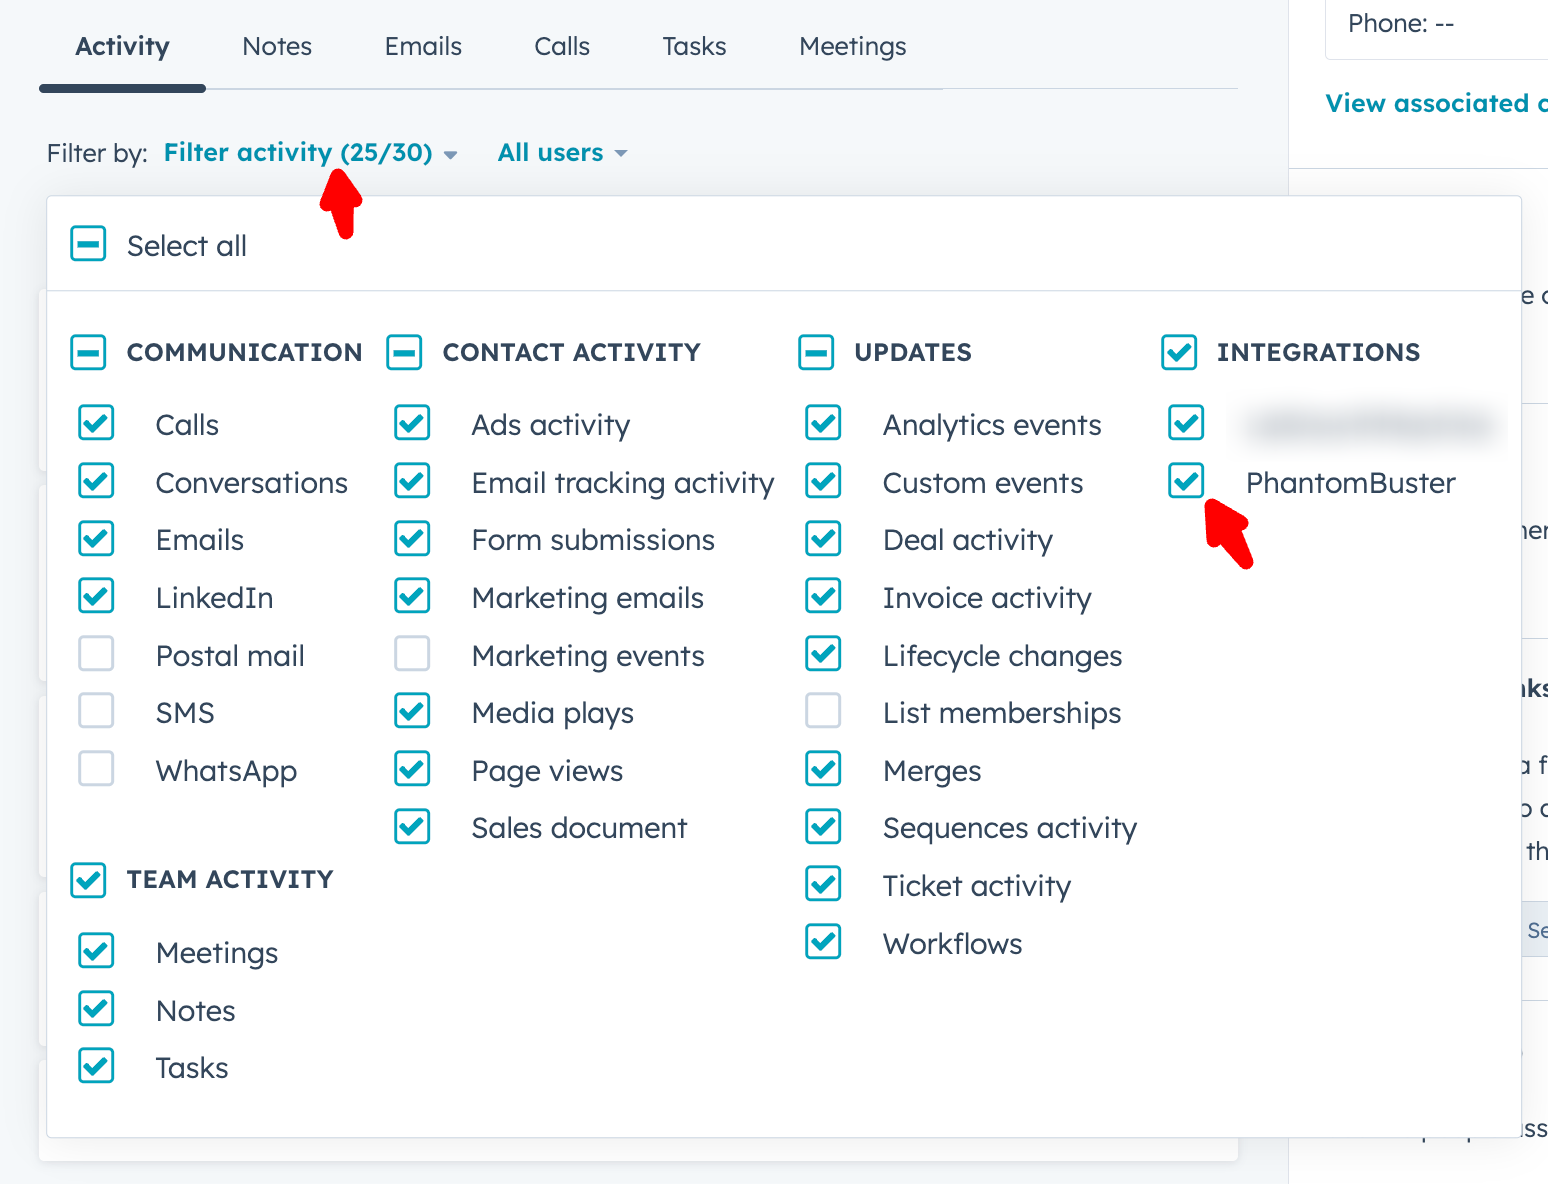
Watch your outreach activity in HubSpot
Make sure to enable the PhantomBuster activity in your contacts’ Activity Thread.
The flow will then log its events on the contact’s activity thread.