
Tutorial
Index
Write and customize your connection acceptance message
This section allows you to automatically greet your prospective connections in a personal way with a message of up to 1000 characters.
Write the message of your choice and customize it with variable placeholder tags. For this, you can use any column in your input or output spreadsheet by placing it between #s. For example:
Hey#firstName#, let's connect!For simplicity, we have also added the available placeholder tags underneath the text box. Just click on the one you want to use and it will be added to your text.
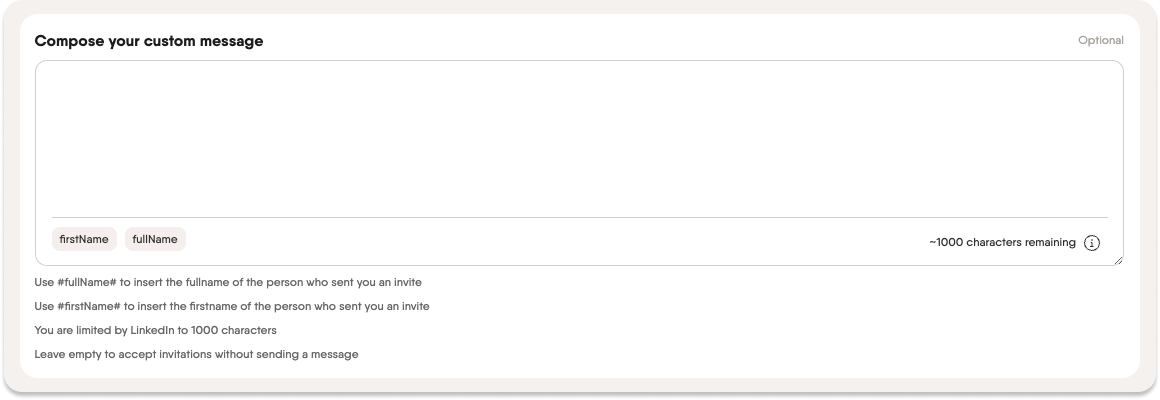 Screenshot of PhantomBuster interface of LinkedIn auto acceptance request message with placeholder tags
Take note: These tags are case-sensitive, so make sure to write them out correctly!
Attach a file to your message
You can attach a file to your message, such as a proposal, white paper, a CV, or a job description. The maximum file size is 20 MB.
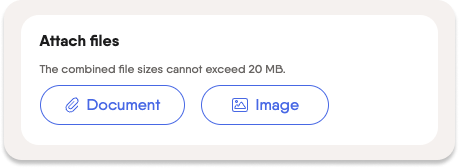 Attach a file to your message
How to use the Domain Name Finder
PhantomBuster’s Domain Name Finder Automation uses public search engines to find a company’s main website domain. This short tutorial walks you through setting inputs, processing options, scheduling, and retrieving results.
Matching limitations:
Returns one main domain (best match) per company. Country & Language settings guide search context but cannot strictly restrict results to specific TLDs (e.g., .fr).
Input requirements:
Google Sheets must be public (anyone with the link); CSV URL input is available on paid plans only. No session cookies are required.
Performance & Safety:
Processes ~14 domains per minute using 1 slot. Search engines may temporarily block shared IPs if requests are too frequent; if stopped, wait ~15 minutes or use a proxy.
Free plan limits:
CSV exports include only the first 10 rows. JSON exports, dynamic CSV download links, and CSV uploads as inputs are unavailable.
Provide the company names:
Choose an input source (My Lists, manual names, a Google Sheet/CSV URL, or My Phantoms), then optionally set Country & Language to guide the search context.
For spreadsheet/CSV inputs, the Phantom reads column A by default. To target a different column, specify its header name in the input settings.
Configure processing settings:
Add any domains to ignore, set how many companies to process per launch for spreadsheet/CSV inputs, and optionally rename the results file.
"Number of companies to process per launch" applies only to spreadsheet/CSV inputs (default 100). Renaming the results file between launches will create a new file and restart processing from scratch.
Select launch frequency:
Run manually, schedule a one-time run, launch repeatedly, trigger it after another Phantom, or use Advanced scheduling for precise timing.
Optional: Adjust advanced settings:
Keep defaults unless you need to fine-tune execution limits, retries, notifications, proxies, webhooks, or file management.
Launch and retrieve results:
Click Launch, then open the Results tab to view found domains and download or export your results.
For full details and configuration options, see the tutorial on the help center.

